


Deck Tiles Guide

Deck Tile Colors
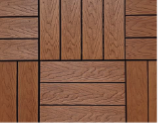
California Oak
Size: 12” X 12”
Pieces Per Box: 11

Espresso
Size: 12” X 12”
Pieces Per Box: 11
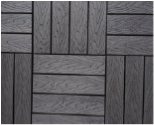
Granite
Size: 12” X 12”
Pieces Per Box: 11
Installation Guidelines
Note: The Information We Provide Is Intended For Our Products Only And Is For Your Reference.
Safety
Please be sure to use safety equipment as it is intended for and failure to comply could result in injury. Use the following: work gloves, safety glasses for eye protection, close toed shoes/boots, and respiratory protection.
Tools
For installation of your new deck tiles, a circular, hand, miter, or table saw may be used. It is recommended to use carbide tipped blades for any power saws. For any areas that are rounded, a jig saw is recommended.
Prior To Installation
The first step in installing your new deck tiles is to make sure you have a clean, flat, and smooth surface in the area you are working on. Also, the installation surface should be structurally sound and water should run off (not puddle up). Please be sure to check with local building codes before installation of your deck tiles. If you are not installing in the near future, we recommend storing the products in a clean and dry area.
Now It’s Time To Lay Your Deck Tiles!
Begin by placing the first tile down and fit the next tile by fastening the small cylinder shaped stub into the bottom side of the holes. This step can be repeated until you’re finished. If you’re creative person, take a step back and look to see if everything matches up to your liking. This will help save energy and time!
Removal Of Tiles
If you need to remove a tile, carefully lift up the side of the tile that contains the holes. Reposition your tile(s) or remove altogether.
Fixing Non-Attached Tiles
If any of the panels come loose, just simply readjust and place the side of the tile, which contains the holes, through the cylinder shaped stub side of the tile.
Fitting Your Deck Tiles
Your project may call for cutting deck tiles and as mentioned earlier, multiple cutting tools can be used. Power saws should be used and we strongly suggest using carbide tipped blades. For any curved or shaped cuts, please use a cut out of the angle you are trying to place the deck tile(s) as a visual guide to ensure a proper cut is made.
After Installation Recommendations
When you can finally sit back and relax after the process of installation, be sure to follow the recommendations below:
- Keep your deck tiles clean and clear of debris
- Do not drag objects across the deck tiles (to avoid damage to the tiles or other items)
- Store extra tiles in case you need a replacement